
Juragan Automatic Order History
Every checkout (WhatsApp or Online Payment) is automatically recorded to your Google Sheet. No server, no monthly fees.
Complete this guide before Online Payments
If you plan to use Midtrans online payments, this page must be completed first: online payments use the webhook URL installed here. Without a webhook, the theme hides the Online Payment method at checkout, and the Settings Code generator will refuse to activate it. The online payment guide is available on the Midtrans Online Payments page.
1. Copy the Sheet template
Open the following template link (this link is also available on the theme download page):
https://docs.google.com/spreadsheets/d/17nnSYtKV4v2kwn8Rl1aYfnY1Y68BQy4yTCfpmVTEq1k/copy
Google will display the "Copy document" dialog. Log in with your preferred Google account (it doesn't have to be the same as your Blogger account), then click Make a copy. The spreadsheet and the order recording script will be copied automatically.
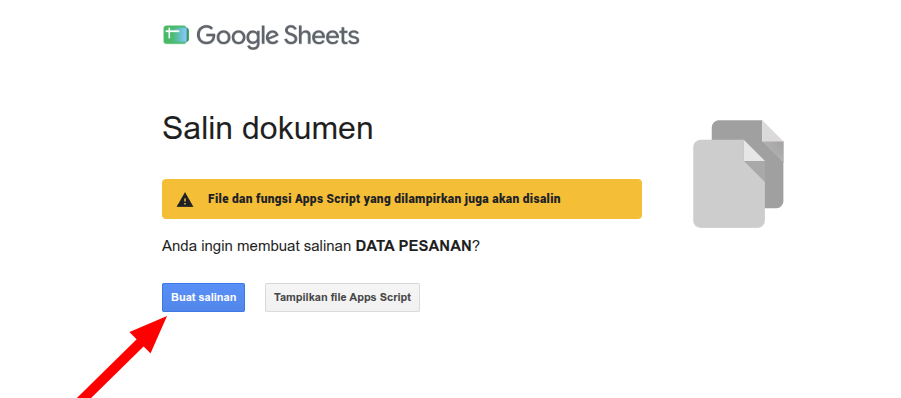
TIP
The copy will open automatically in a new tab and become entirely yours. No changes are needed.
2. Deploy as a Web App
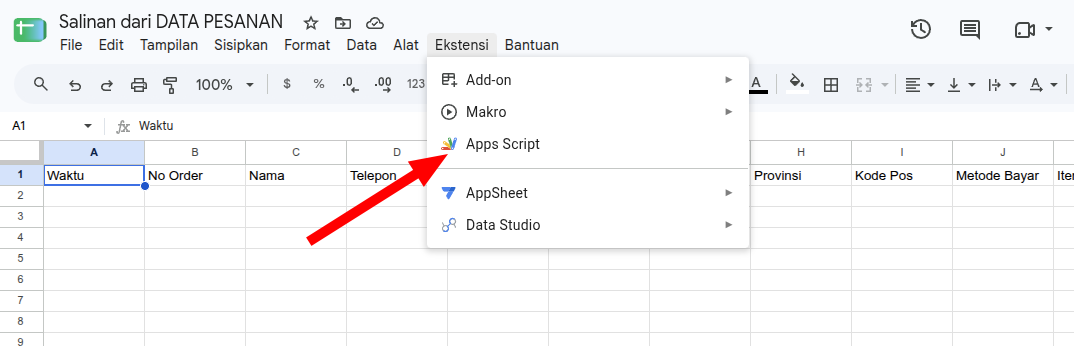
In the copied spreadsheet, open the Extensions menu, then click Apps Script.
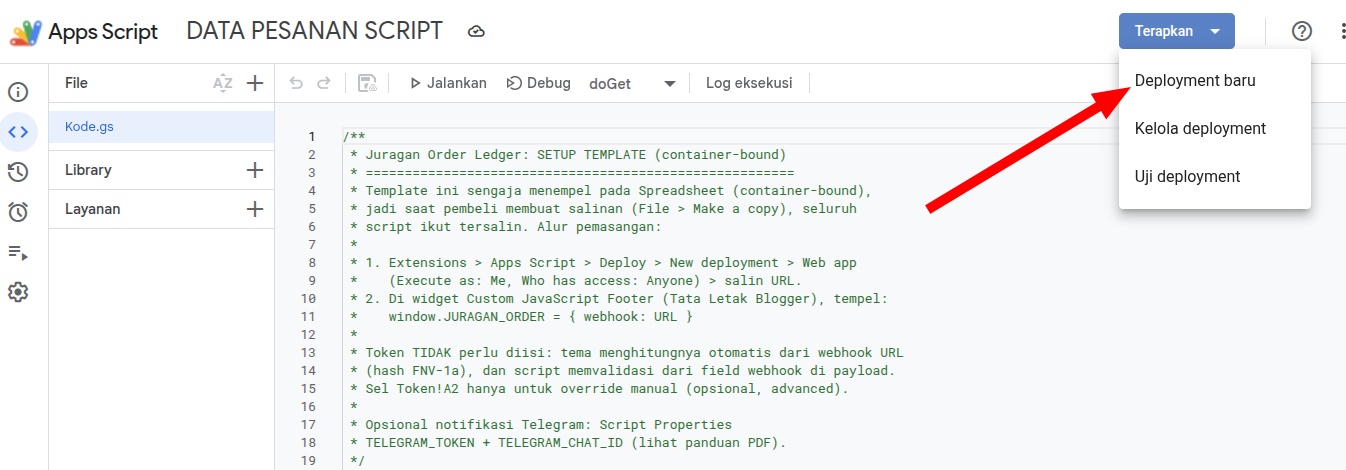
Click the Deploy button in the top right, then select New deployment.
Ensure: Execute as = Me (...@gmail.com), Who has access = Anyone. Click Deploy.
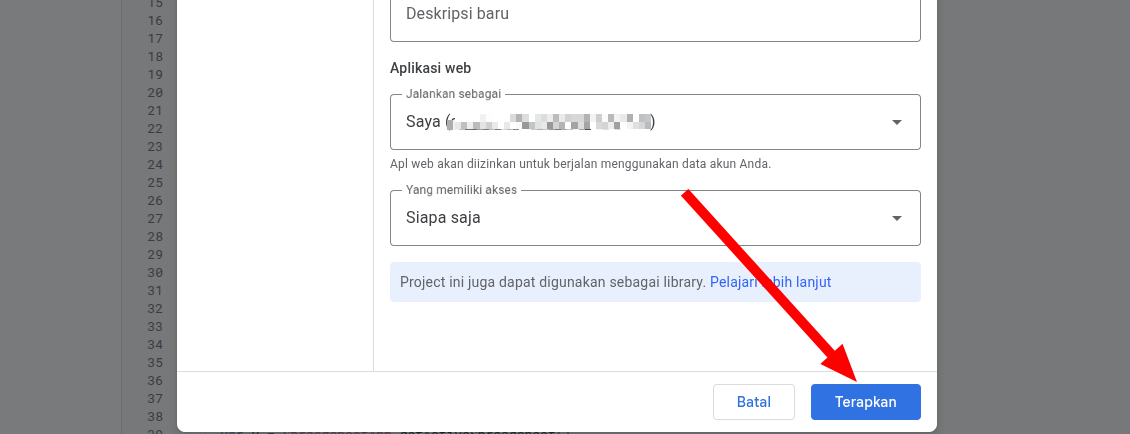
Why "Anyone"?
The entity calling this URL is your blog visitor (not logged into Google). "Execute as Me" means data is written to your Sheet.
3. Authorize Access (once)
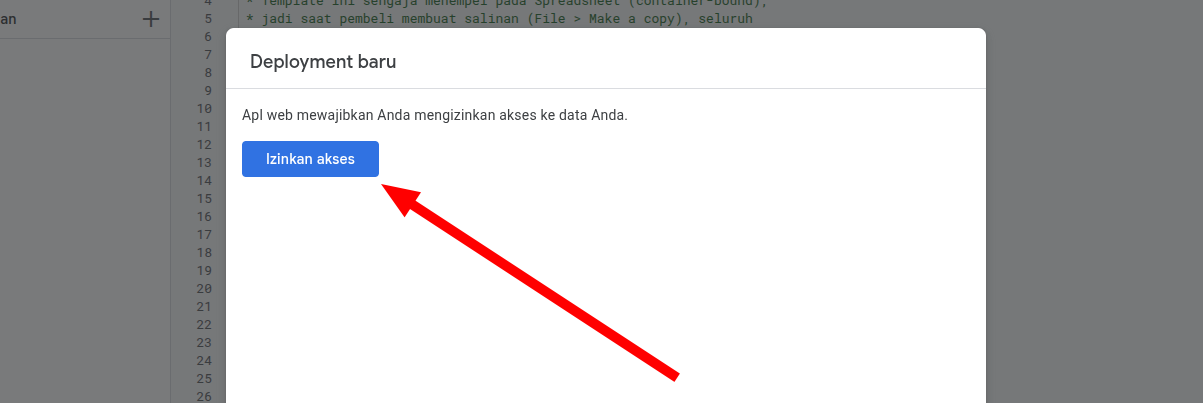
After clicking Deploy, Google will request access permission. Click Authorize access.
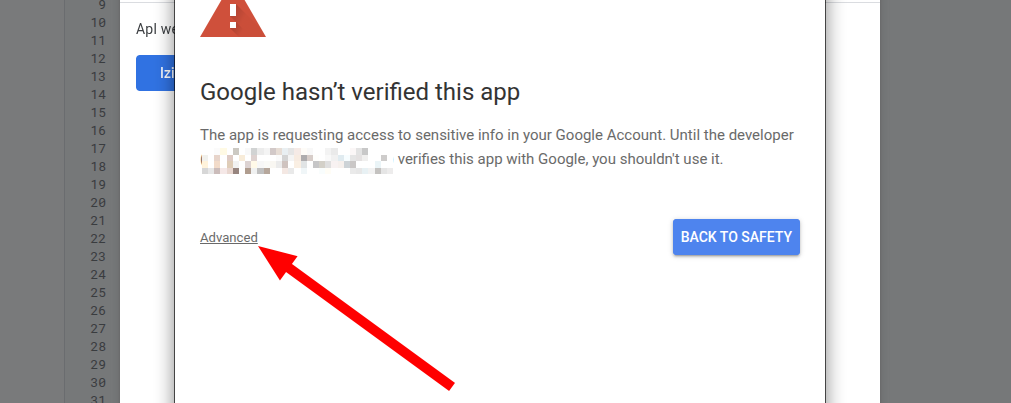
The "Google hasn't verified this app" screen
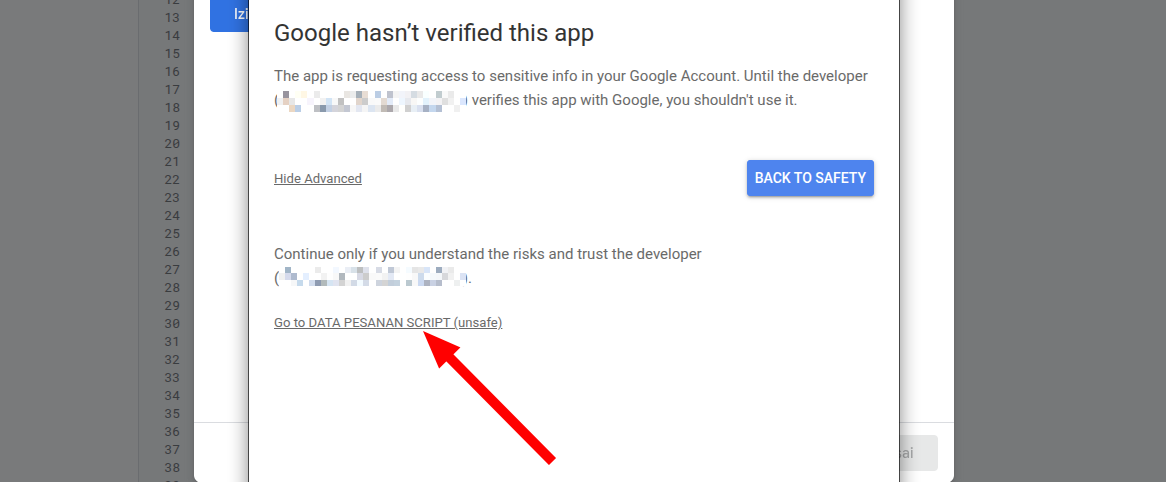
This is not an alarm. Google displays this for all new web app scripts. Simply click Advanced, then Go to ORDER DATA SCRIPT (unsafe).
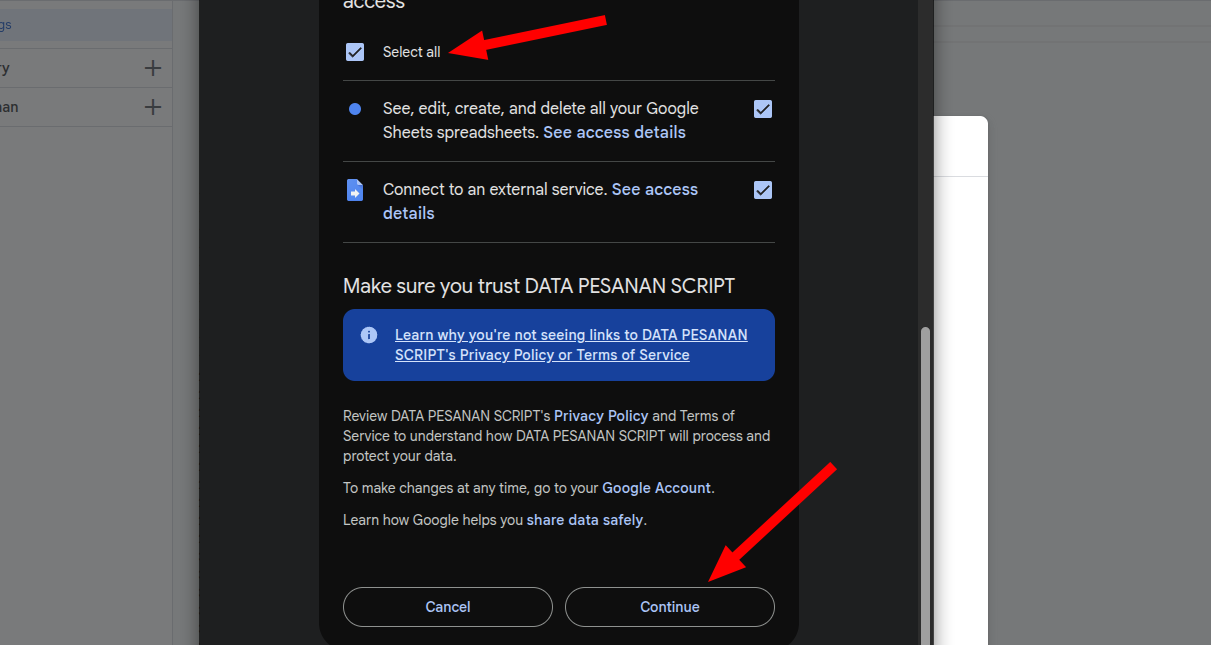
Check all, then click Continue. This is a one-time process; the permission screen will not reappear.
4. Copy the web app URL
Deployment is complete. Google will display the web app URL in the form https://script.google.com/macros/s/XXXX/exec. Click the Copy button next to the URL.
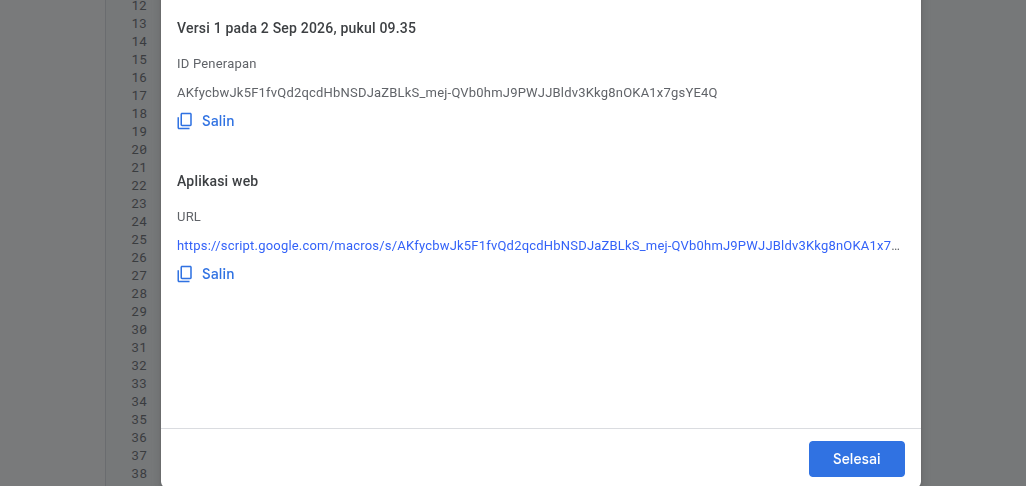
This URL is the webhook address used by the theme to send order data. Save it for now.
5. Install the webhook in the theme
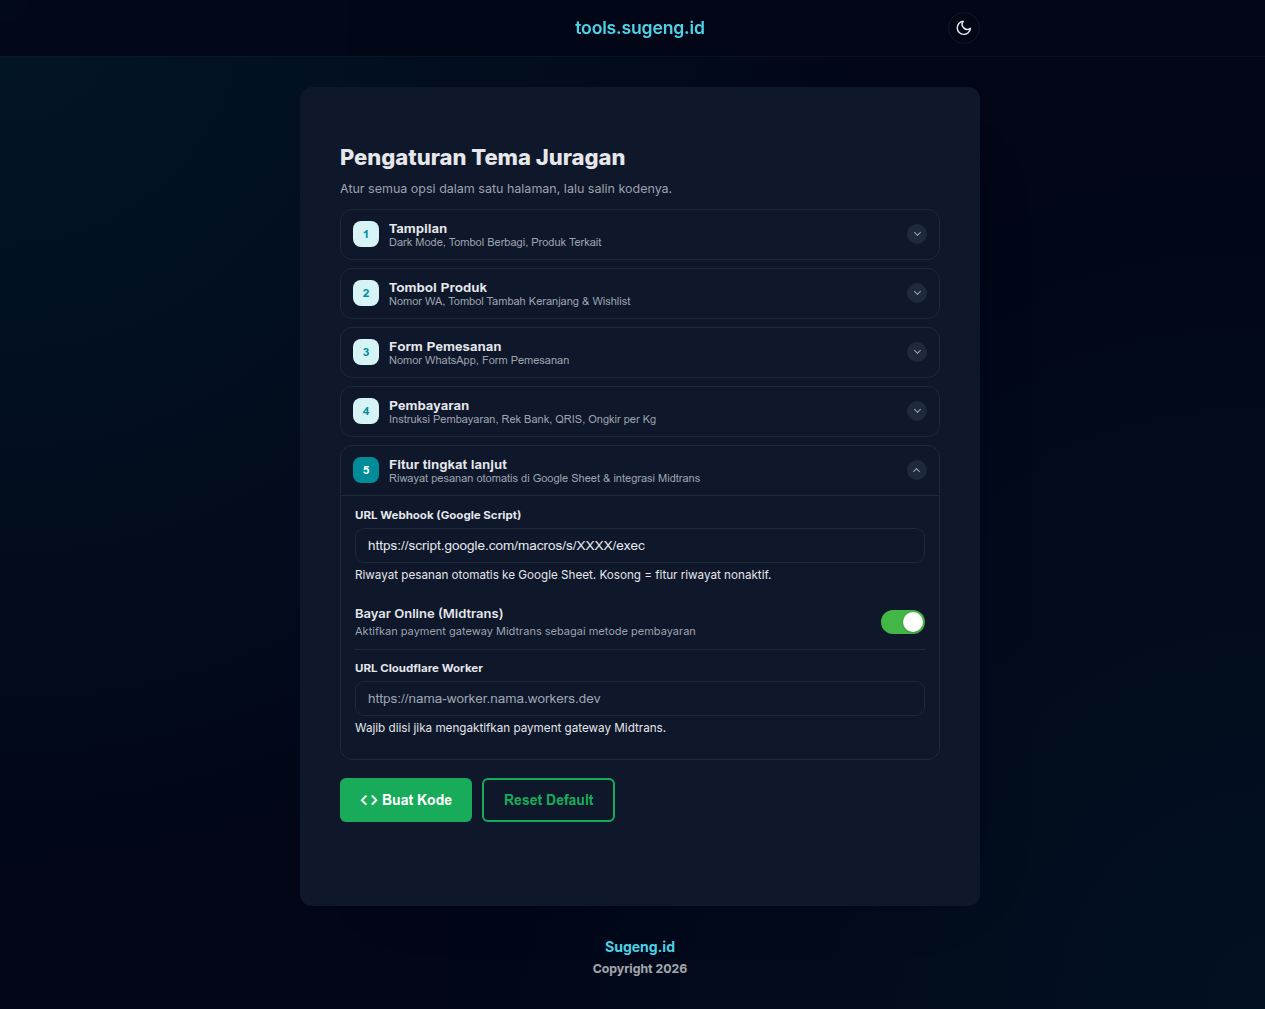
- Open the Settings Code Generator at https://tools.sugeng.id/juragan-setting/.
- Open the Advanced features group.
- Fill in the Webhook URL (Google Script) field with the URL from step 4.
- Click Generate Code, copy the entire code, then paste it into the Template Settings Code widget in the Layout menu (replace the old content), click Save.
Already have other settings code?
No need to regenerate from scratch. Just add the line orderWebhookUrl : "https://script.google.com/macros/s/XXXX/exec" within the existing themeSetting object (replace the URL with yours).
Compatibility
The old installation method via the Custom JavaScript Footer widget (window.JURAGAN_ORDER) is still supported, but the official way is through the Template Settings Code above.
6. Test Run
- Open your blog from a mobile phone (incognito mode).
- Select a product, checkout, fill in the buyer form, send to WhatsApp.
- Open the copied Google Sheet: a new order row should appear with a number starting with JRG.
- The Item column displays product details (variants are also recorded, e.g.:
1x Woven Rattan Bag (Size: M, Color: Brown)). - Order status can be changed manually: New → Processed → Shipped → Completed.
Automatic Limitations (anti-spam)
To protect the Sheet from fake data, the script limits a maximum of 50 orders per WhatsApp number per 10 minutes and 120 total orders per minute. These limits are well above normal store usage. Rejected orders do not affect the buyer's WhatsApp checkout.
7. Telegram Notifications (optional)
- Create a bot via @BotFather on Telegram (
/newbot), copy the bot token. - Find your chat ID via @userinfobot (
/start). - In the Apps Script editor (Extensions → Apps Script) open Project Settings → Script properties, add two properties:
TELEGRAM_TOKEN(bot token) andTELEGRAM_CHAT_ID(chat ID), then Save.
Every new order will trigger a Telegram notification containing the order number, total, items, buyer's name, WhatsApp, and address.
Continue to: Midtrans Online Payments (optional, to accept QRIS / Virtual Account / E-Wallet payments).